
Most people associate fermentation with alcohol – beer, wine, and spirits. But what about vegetables, fruit, dairy, or protein? Did you know you can ferment almost anything?
Fermentation is a great way to preserve fresh foods, in addition to providing some amazing benefits to our guts and digestive system. It is especially popular with homesteaders because of its ease and effectiveness at preserving the harvest throughout winter.
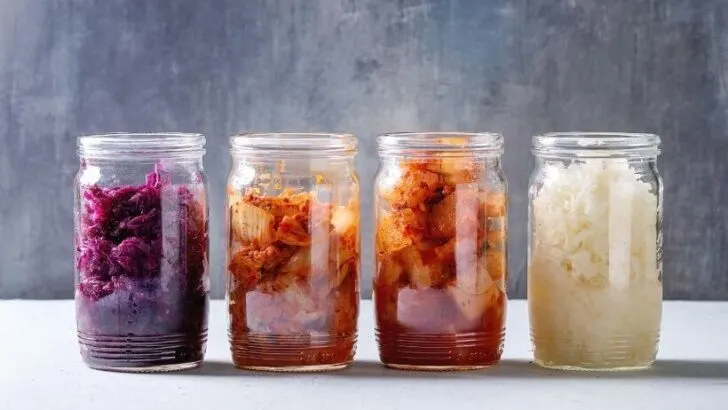
Some popular fermented foods you’ve probably heard of are sauerkraut, kimchi, sourdough, miso, and tempeh. Even some yogurts are fermented. We recommend beginners start with fermenting simple vegetable recipes and move to more advanced ingredients later on.
We have everything you need to know about fermenting for beginners right here in one place. This guide is meant to introduce you to the process of fermentation, what equipment you will need, and what the benefits of it are.
After reading this, you will know all about fermentation and will be ready to use any lacto-fermentation recipe you choose. Treat this intro as a general primer on the subject, and the recipes will provide detailed measurements and instructions for that specific ferment.
Check out some of our other articles on fermentation:
– Pickling vs. Fermenting
– 28 Easy Fermentation Recipes
– 19 Sourdough Discard Recipes
What is Fermentation?
Fermentation is the chemical breakdown of a substance using bacteria, yeasts, or other microorganisms. This activity of microorganisms breaking down sugars is used to create a desirable change in food or beverages. Desirable changes include increasing flavor, long-term preservation, and increasing the availability of nutrients.
There are three different types of fermentation:
1. Ethanol/alcohol fermentation
Yeast breaks down starches and/or sugars into alcohol and carbon dioxide molecules. It requires special equipment, a lot of time, and patience. This is how beer and wine are made.
2. Acetic acid fermentation
Apple cider vinegar, wine vinegar, and kombucha are all made by acetic acid fermentation.
It’s a somewhat complicated process in scientific terms, so here is the watered-down explanation: A yeast or culture is added to the ferment, which then converts sugars into alcohol. A bacteria then oxidizes the alcohol into acetic acid and water.
We’ve never tried acetic acid fermentation, but plan on making our own kombucha in the near future.
3. Lacto-fermentation
Bacteria and yeast strains convert starches or sugars into lactic acid. This method is used in making sauerkraut, kimchi, sourdough bread, and more.
We strongly recommend amateur fermenters start out with lacto-fermentation. Not only is it the easiest, least expensive method of fermentation, but it’s also the safest. The rest of this guide will focus on the process and benefits of lacto-fermentation!

What Is Lacto-Fermentation?
Lacto-fermentation is a simple process of preserving food that only requires salt, water, and vegetables. There are traditionally no added cultures or yeast in any lacto-fermented foods (although they can be added if desired). Let’s break down the science…
For the sake of simplicity, there are two categories of natural microorganisms found on food: good and bad. Bad microbes are what cause fresh produce to start rotting after a few days or a week.
In the case of lacto-fermentation, the good bacteria, called lactobacillus, converts the sugars in fruits and vegetables into lactic acid. Lactic acid is a natural preservative that both inhibits the growth of bad bacteria and promotes the growth of healthy bacteria in the intestinal tract. Additionally, lactic acid preserves the flavor and nutritional content of food being fermented.
The challenge of lacto-fermentation is to find ways to promote the growth of beneficial bacteria and inhibit the ones that promote rotting. The solution for that challenge is quite simple: salt.
For some magical reason, salt inhibits the growth of the bad microbes prone to spoiling food, while the good ones can tolerate it. By mixing salt with your vegetables/fruits or placing them in a brine, you’re promoting the growth of microbes that will help preserve your food while wiping out most of the bad ones. It’s already a tremendous advantage to start with.
Nutritional Benefits of Lacto-Fermented Food
There are many benefits of eating lacto-fermented foods! They are especially good for promoting gut health. Below are three primary benefits.
Easy To Digest
Lacto-fermentation involves breaking down some sugars and starches in food. This makes fermented foods easier to digest than their un-fermented counterparts.
Fermentation also helps neutralize anti-nutrients like phytic acid, which occurs in grains, nuts, seeds, and legumes. Phytic acid impairs the body’s absorption of minerals like iron, zinc, and calcium. Phytates also make starches, proteins, and fats less digestible, so neutralizing them is extremely beneficial.
Probiotic
Probiotics are live bacteria and yeasts that are good for you. This is why probiotic foods are often considered to be “alive.” Eating probiotics transfers the good bacteria from the food to our bodies, where they continue to live and provide benefits to our guts.
Our gut lining, called the mucosa, houses a large proportion of our immune system. The mucosa is always covered with a thick layer of mucus that serves two purposes: lubrication of food to facilitate movement within the stomach, and the formation of a protective layer across the stomach cavity. The protective layer serves as a natural barrier against harmful bacteria in our guts.
In short, probiotic-rich foods help our immune systems become more robust. In turn, this means fermented foods support a healthy gut and immune system.
Increases Availability of Nutrients
Fermentation can increase the availability of vitamins and minerals for our bodies to absorb. Additionally, by boosting the beneficial bacteria in your gut, you are promoting their ability to manufacture B vitamins and synthesize vitamin K.
B vitamins help support or promote cell health, energy levels, good digestion, healthy brain function, growth of red blood cells, and more. Vitamin K helps to make various proteins that are needed for blood clotting and the building of bones.

Equipment Needed
As far as fermentation equipment, you can go simple or all-out. At the most basic level, you need a glass jar with a lid. There are several other tools that may be helpful in ensuring your fermentations are successful, however, these are not all necessary.
- Vegetable chopper such as a knife, mandolin slicer, or food processor
- Cutting board
- A kraut pounder
- Large bowl
- Fermenting vessel (glass jar or crock)
- Weight and cover system
If you don’t have any supplies, this fermentation kit is a great place to start! It has the pounder, weights, and fermentation covers, you just need to supply the mason jars.
How To Actually Ferment and Fermentation Techniques
So, you’re probably wondering how to actually ferment something. The process itself is pretty simple and no matter what recipe you use, it will be some variation of these steps:
- Clean and chop vegetables.
- Create a salt brine by either combining water and salt or massaging salt into your vegetables to release the natural juices.
- Pack the vegetables and brine tightly into a mason jar, pressing down to eliminate as much air as possible within the jar.
- Leave one to two inches of room at the top for any gasses or liquid that will build up.
- Make sure the brine is covering the vegetables, use a fermentation weight if needed.
- Cover and leave at room temperature (out of direct sunlight) for 48 hours to 2 weeks.
- “Burp” the jar daily – meaning open the top to let any built-up gasses out to relieve pressure.
- Check smell and taste every few days and refrigerate once it is to your liking.
That’s the basic lacto-fermentation process. For more specific details, refer to whatever recipe you’re using. We recommend using recipes for a while until you have a good hands-on grasp of how the process works.
There are several types of lacto-fermentation techniques you can use, depending on what you want the end product to be. Here are the most common:
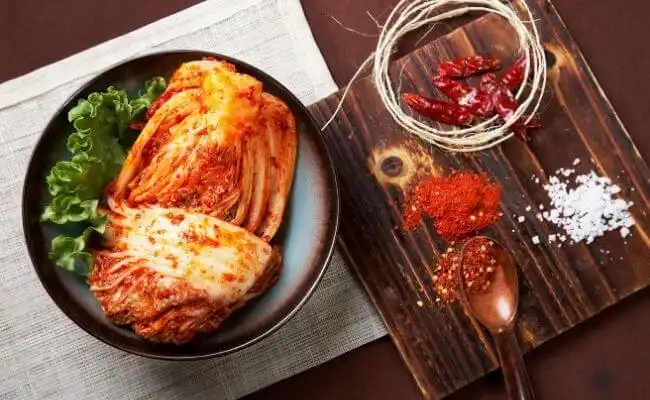
Sauerkraut-Type Ferments
This is just what it sounds like – ferments that use chopped or shredded vegetables similar to and including sauerkraut. Salt is mixed and massaged into the vegetables to extract the natural juices. The natural juices and salt combine to create a brine-like solution which helps preserve the ferment. Examples include sauerkraut, kimchi, and coleslaw.
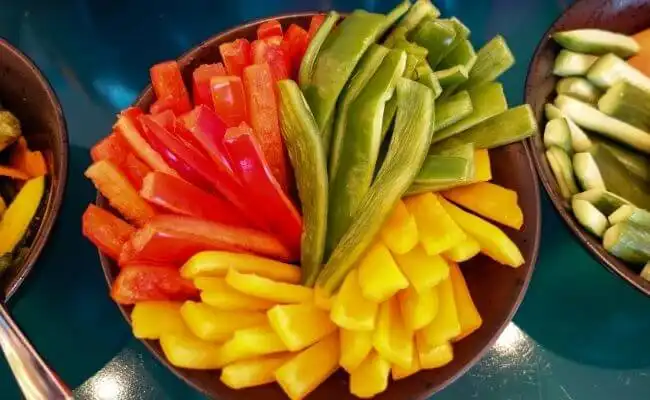
Brine-Based Ferments
Brine-based fermentation is used for larger and firmer vegetables that cannot have the juices extracted from them. The vegetables are sliced into small pieces, and then submerged in a brine made out of salt and water. Vegetables used with this technique include cucumbers, bell peppers, carrot sticks, cauliflower, and radishes.
Liquid Ferments
This includes salsa, soup, hot sauce, and other condiments. Yes, you can ferment all of those things! These ferments can’t be submerged in a brine, since they’re already liquid. The solution is to stir or shake the ferments twice or more daily. Liquid ferments are a little different than the two above, so make sure to follow the recipe.
What Foods Can Be Fermented?
As we alluded to earlier, basically any food can be fermented. The most common homemade fermented foods include:
- cabbage
- tomatoes
- carrots
- beets
- peppers
- cucumbers
- radishes
The Importance of Using the Right Ingredients
Fruits and Vegetables
Organic produce is preferable, but it is not necessary. Non-organic fruits and vegetables still contain enough good bacteria to ferment successfully. This is truly a personal preference, but we always recommend staying away from any produce treated with chemicals when possible.
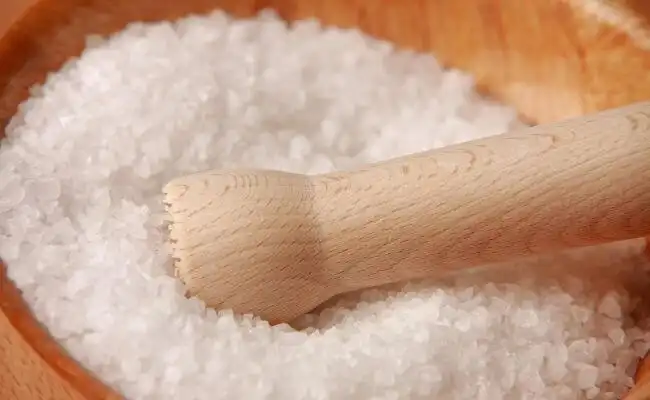
Salt
We, and most experts on the subject, recommend using natural sea salt for lacto-fermentation. Both iodized salt and table salt contain additional ingredients that can interfere with the fermentation process.
Iodine can inhibit the beneficial bacteria in a cultured vegetable, which is why iodized salt is not recommended. Other table salts contain anti-caking agents that can also interfere with fermentation.
When choosing which salt to buy, look at the ingredients. There should only be one: sea salt. If there are any other ingredients listed, we recommend finding a different salt to use for fermentation.
Water
There is a lot of debate over the importance of water used in fermentation. We’ve read several conflicting recommendations regarding whether water should be filtered, distilled, or needs simply to be drinkable.
The composition of tap water varies widely by geographic region and even from house to house. Some water is treated with chlorine and fluoride, while other water may be heavy with certain minerals or other microbes. The chemicals and minerals in the water you use can possibly have negative effects on your ferments.
If your tap water is drinkable, it’s safe to use, but we recommend boiling it first. This will eliminate most common pathogens that get into drinking water supplies. If you want to take it a step further, you can either purchase distilled water or follow this tutorial to make your own homemade distilled water.
How Long Does Lacto-Fermentation Take?
You will leave your ferments out at room temperature for anywhere from just 48 hours to 2 weeks. The longer your ferment sits at room temperature, the “funkier” and more acidic it will become. You can judge this by smelling and tasting it every few days.
How long you decide to leave your ferment out is truly up to personal preference. It will take some experimentation to find the sweet spot for your tastes and preferences.
Lacto-Fermentation vs Canning
While lacto-fermentation is a common and traditional form of pickling and preserving vegetables, it is not the same thing as canning.
Canned foods can last a very long time, possibly even longer than 2 years. Fermented foods can last several months and some possibly up to a year in the refrigerator.
However, it’s important to note that the fermentation process continues in the refrigerator. This means the taste and texture will continue to change the longer a ferment is stored.
Typically, you begin eating a fermented food once it has reached the desired level of fermentation, and you finish it before the end of its “shelf life.” By contrast, canning involves some form of sterilization and is intended to preserve food in its canned state for long periods – often a year or more.
Think of it like this – canning stops the rotting process indefinitely and keeps food preserved exactly the same as the day it is canned. Fermentation, however, simply prolongs the freshness of food by slowing the rotting process.

Fermenting Recipes For Beginners
Below are several extremely easy lacto-fermentation recipes to start off with. If you’re looking for more easy recipes to try, check out 21 Easy Fermentation Recipes.
Spicy Fermented Carrots – a great way to spice up those boring carrot sticks! These are perfect as a healthy, flavorful snack.
Easy Kimchi – a delicious way to spice up any Asian-flavored dish.
Sauerkraut – try some this summer on your hot dogs or brats!
Fermented Hot Sauce – an easy recipe to try as your first liquid ferment.
Easy Fermented Dill Pickle Chips – everyone loves pickles… need we say more?!
8 Fermentation Books for Beginners - Modern Day Self Reliance
Monday 7th of April 2025
[…] Check out some of our other articles on fermentation:– 28 Easy Fermentation Recipes– Pickling vs. Fermenting– 19 Sourdough Discard Recipes– Intro to At-Home Fermenting […]
28 Easy Fermentation Recipes - Modern Day Self Reliance
Tuesday 28th of November 2023
[…] you’re new to fermentation, check out our Introduction To At-Home Fermentation to learn more before trying out these […]
19 Sourdough Discard Recipes - Modern Day Self Reliance
Sunday 8th of October 2023
[…] you like this post, check out some of these:– 28 Easy Fermentation Recipes– Introduction To At-Home Fermenting– 58 Easy Dehydrator […]
Pickling Vs. Fermenting - Modern Day Self Reliance
Tuesday 3rd of January 2023
[…] Like pickling, there are also 3 types of fermentation – lactic acid fermentation, alcoholic fermentation, and acetic acid fermentation. To learn more about fermentation, check out our in-depth guide here: Intro To At-Home Fermentation. […]